Last modified on July 23rd, 2019 by Vincy.
User registration or sign up is an integral part of many web applications and it is critical to get it right for the success of the application. It is the starting point of user engagement with your application.
It should be as simple as possible with the best UI / UX. Implementing user registration functionality using PHP is a simple task and I will walk you through the steps with example in this article.
What is inside?
How does this PHP user registration example work?
This example code can be separated into 3 parts.
- Getting user information via a HTML form.
- Validating user submitted information on form submit.
- Database handling to save registered user to the database after validation.
The third step will be executed after ensuring that the user is not added already. This data uniqueness validation will be performed based on their email and username entered by them.
During registration we generally collect user information, who are ready to register with our application. Some of them will be mandatory and some of them will be optional.
So, this functionality may also include validation part to ensure about the non-emptiness and the format of the user data. The validation could be done either in the client-side or server-side.
Having validation at server-side is always better. You can choose to have it in client-side also for the ease of use of the users. But having at the server-side is not optional and a minimum requirement.
file structure

HTML form to allow user to register
In this example, the registration form contains the fields Username, Name(Display Name), Password and Email. It also has the Confirm Password field to let the user to reenter his password for the confirmation. These two passwords will be compared later at the time of a .
By submitting this form, the user is expected to agree to the terms and conditions. So a checkbox field is added before the Register button for ensuring it.
And the styles are
Body ( font-family: Arial; color: #333; font-size: 0.95em; ) .form-head ( color: #191919; font-weight: normal; font-weight: 400; margin: 0; text-align : center; font-size: 1.8em; ) .error-message ( padding: 7px 10px; background: #fff1f2; border: #ffd5da 1px solid; color: #d6001c; border-radius: 4px; margin: 30px 0px 10px 0px ; ) .success-message ( padding: 7px 10px; background: #cae0c4; border: #c3d0b5 1px solid; color: #027506; border-radius: 4px; margin: 30px 0px 10px 0px; ) .demo-table ( background: #ffffff; border-spacing: initial; margin: 15px auto; word-break: break-word; table-layout: auto; line-height: 1.8em; color: #333; border-radius: 4px; padding: 20px 40px ;width: 380px;border: 1px solid;border-color: #e5e6e9 #dfe0e4 #d0d1d5; ) .demo-table .label ( color: #888888; ) .demo-table .field-column ( padding: 15px 0px; ) .demo-input-box ( padding: 13px; border: #CCC 1px solid; border-radius: 4px; width: 100%; ) .btnRegister ( padding: 13px; background-color: #5d9cec; color: #f5f7fa; cursor: pointer; border-radius: 4px width: 100% border: #5791da 1px solid; font-size: 1.1em ) .response-text ( max-width: 380px; font-size: 1.5em; text-align: center; background: #fff3de; padding: 42px; border-radius: 3px; border: #f5e9d4 1px solid; font-family : arial; line-height: 34px; margin: 15px auto; ) .terms ( margin-bottom: 5px; )
How to validate user information on form submit
A server-side form validation script is added to this example for validating the user registration data. This PHP validation script will be called on submitting the registration form.
This script validates all form fields to check the non-emptiness for each field. Then it validates the user email format using PHP's filter_var() function.
As the registration includes a password confirmation feature, the password comparison will take place at this part of this example.
Finally, the validation script will check if the user accepts term and condition by checking the appropriate box on the form.
Once all the validation is completed by returning boolean true, then the actual registration process will take place.
Function validateMember() ( $valid = true; $errorMessage = array(); foreach ($_POST as $key => $value) ( if (empty($_POST[$key])) ( $valid = false; ) ) if($valid == true) ( if ($_POST["password"] != $_POST["confirm_password"]) ( $errorMessage = "Passwords should be same."; $valid = false; ) if (! isset ($error_message)) ( if (! filter_var($_POST["userEmail"], FILTER_VALIDATE_EMAIL)) ( $errorMessage = "Invalid email address."; $valid = false; ) ) if (! isset($error_message)) ( if (! isset($_POST["terms"])) ( $errorMessage = "Accept terms and conditions."; $valid = false; ) ) ) else ( $errorMessage = "All fields are required."; ) if ( $valid == false) ( return $errorMessage; ) return; )
PHP MySQL code to access database to save registered user
Server-side user form validation
This is the PHP entry point to handle all the server-side script to validate form and to handle database operations based on the validation result.
validateMember($username, $displayName, $password, $email); if (empty($errorMessage)) ( $memberCount = $member->isMemberExists($username, $email); if ($memberCount == 0) ( $insertId = $member->insertMemberRecord($username, $displayName, $ password, $email); if (! empty($insertId)) ( header("Location: thankyou.php"); ) ) else ( $errorMessage = "User already exists."; ) ) ) ?>
Check if user already exists
The isMemberExists() function is used to check the user data uniqueness based on their email and the username. If the entered username or email there exists in the user database, then the registration process will be stopped by returning and acknowledgment.
This acknowledgment will notify that the “user already exists”. the code is,
Function isMemberExists($username, $email) ( $query = "select * FROM registered_users WHERE user_name = ? OR email = ?"; $paramType = "ss"; $paramArray = array($username, $email); $memberCount = $this->ds->numRows($query, $paramType, $paramArray); return $memberCount; )
Insert member data to the database
If it returns 0 then it means that there is no such users exist with the email or the username entered. And so, the registration data will be inserted to the database. The following code shows the member insert method.
Function insertMemberRecord($username, $displayName, $password, $email) ( $passwordHash = md5($password); $query = "INSERT INTO registered_users (user_name, display_name, password, email) VALUES (?, ?, ?, ? )"; $paramType = "ssss"; $paramArray = array($username, $displayName, $passwordHash, $email); $insertId = $this->ds->insert($query, $paramType, $paramArray); return $insertId; )
DataSource.php
This is the generic data source class in PHP to perform database operations. It includes functions to connect database and execute various queries to get database result, row count, execute insert and more.
This datasource class is generic and kept as simple as possible. It is efficient and I use it in my most of the micro projects and tutorials. You are free to download and use it.
important thing is never forget to use the Prepared Statements. It helps you to safeguard from SQL injection attacks and it is the first step in terms of implementing security in a web application.
conn = $this->getConnection(); ) /** * If connection object is needed use this method and get access to it. * Otherwise, use the below methods for insert / update / etc. * * @return \mysqli */ public function getConnection() ( $conn = new \mysqli(self::HOST, self::USERNAME, self::PASSWORD, self::DATABASENAME); if (mysqli_connect_errno()) ( trigger_error ("Problem with connecting to database."); ) $conn->set_charset("utf8"); return $conn; ) /** * To get database results * @param string $query * @param string $paramType * @ param array $paramArray * @return array */ public function select($query, $paramType="", $paramArray=array()) ( $stmt = $this->conn->prepare($query); if(! empty($paramType) && !empty($paramArray)) ( $this->bindQueryParams($sql, $paramType, $paramArray); ) $stmt->execute(); $result = $stmt->get_result(); if ($result->num_rows > 0) ( while ($row = $result->fetch_assoc()) ( $resultset = $row; ) ) if (! empty($resultset)) ( return $resultset; ) ) / ** * To insert * @param string $query * @param string $paramType * @param array $paramArray * @return int */ public function insert($query, $paramType, $p aramArray) ( print $query; $stmt = $this->conn->prepare($query); $this->bindQueryParams($stmt, $paramType, $paramArray); $stmt->execute(); $insertId = $stmt->insert_id; return $insertId; ) /** * To execute query * @param string $query * @param string $paramType * @param array $paramArray */ public function execute($query, $paramType="", $paramArray=array()) ( $ stmt = $this->conn->prepare($query); if(!empty($paramType) && !empty($paramArray)) ( $this->bindQueryParams($stmt, $paramType="", $paramArray= array()); ) $stmt->execute(); ) /** * 1. Prepares parameter binding * 2. Bind prameters to the sql statement * @param string $stmt * @param string $paramType * @param array $ paramArray */ public function bindQueryParams($stmt, $paramType, $paramArray=array()) ( $paramValueReference = & $paramType; for ($i = 0; $i< count($paramArray); $i ++) { $paramValueReference = & $paramArray[$i]; } call_user_func_array(array($stmt, "bind_param"), $paramValueReference); } /** * To get database results * @param string $query * @param string $paramType * @param array $paramArray * @return array */ public function numRows($query, $paramType="", $paramArray=array()) { $stmt = $this->conn->prepare($query); if(!empty($paramType) && !empty($paramArray)) ( $this->bindQueryParams($stmt, $paramType, $paramArray); ) $stmt->execute(); $stmt->store_result(); $recordCount = $stmt->num_rows; return $recordCount; ) )
Database script
This database script has the create statement for the registered_users table. Import this script in your development environment to run this code.
Table structure for table `registered_users` -- CREATE TABLE IF NOT EXISTS `registered_users` (`id` int(8) NOT NULL AUTO_INCREMENT, `user_name` varchar(255) NOT NULL, `first_name` varchar(255) NOT NULL, ` last_name` varchar(255) NOT NULL, `password` varchar(25) NOT NULL, `email` varchar(55) NOT NULL, `gender` varchar(20) NOT NULL, PRIMARY KEY (`id`));
If the registration form validation fails, then the error message will be shown to the user as like as below.

Comments to “PHP User Registration Form (Sign up) with MySQL Database”
Hi Vincy, I get the following errors when running the register code, please help.
INSERT INTO registered_users (user_name, display_name, password, email) VALUES (?, ?, ?, ?)
Warning: call_user_func_array() expects parameter 1 to be a valid callback, first array member is not a valid class name or object in C:\xampp\htdocs\PHP\JAMII-CASH\DataSource.php on line 136
Fatal error: Uncaught Error: Call to a member function execute() on boolean in C:\xampp\htdocs\PHP\JAMII-CASH\DataSource.php:99 Stack trace: #0 C:\xampp\htdocs\PHP\JAMII -CASH\Member.php(83): Phppot\DataSource->insert('INSERT INTO reg…', 'ssss', Array) #1 C:\xampp\htdocs\PHP\JAMII-CASH\index.php(20 ): Phppot\Member->insertMemberRecord('chuki10', 'Ray', '202020', ' [email protected]…’) #2 (main) thrown in C:\xampp\htdocs\PHP\JAMII-CASH\DataSource.php on line 99
Good day friends! Let's take a look at user registration in PHP. First, let's define the conditions for our user registration:
- The password is encrypted using an algorithm MD5
- The password will be "salt"
- Login busy check
- User activation by letter.
- Recording and storage of data in DBMS MySQL
To write this script, we need to understand what user registration is. User registration is the acquisition of real user data, processing and storage of data.
In simple words, registration is just a record and storage of certain data by which we can authorize the user in our case - this is the Login and Password.
Authorization - granting a certain person or group of persons the rights to perform certain actions, as well as the process of verifying these rights when trying to perform these actions. Simply put, with the help of authorization, we can restrict access to a particular content on our site.
Let's take a look at the script directory structure to implement our login with authorization. We need to break scripts into logical parts. We placed the registration and authorization modules in a separate directory. We will also place the database connection in separate directories. MySQL, file with custom functions, style file css and our template HTML. This structure allows you to quickly navigate through scripts. Imagine that you have a big site with a bunch of modules and so on. and if there is no order, it will be very difficult to find something in such a mess.
Since we will store all data in DBMS MySQL, then let's create a small table in which we will store registration data.
First you need to create a table in the database. Let's call the table bez_reg where bez is the table prefix, and reg table name.
Table structure: bez_reg
-- -- `bez_reg` table structure -- CREATE TABLE IF NOT EXISTS `bez_reg` (`id` int(11) NOT NULL AUTO_INCREMENT, `login` varchar(200) NOT NULL, `pass` varchar(32) NOT NULL , `salt` varchar(32) NOT NULL, `active_hex` varchar(32) NOT NULL, `status` int(1) NOT NULL, PRIMARY KEY (`id`)) ENGINE=MyISAM DEFAULT CHARSET=utf8 AUTO_INCREMENT=1 ;Now let's create the main scripts for further work.
INDEX.PHP FILE
CONFIG.PHP FILE
"); ?>
File 404.HTML
Error 404 |
There was a 404 error on the page |
| Return |
BD.PHP file
INDEX.HTML FILE
FUNCT.PHP FILE
"."\n"; if(is_array($data)) ( foreach($data as $val) $err .= "
Let's start writing registration. To begin with, we will need to make a registration form template so that the user can enter his data for processing. Next, we will need to write the form handler itself, which will check the correctness of the user's entered data. After the data is successfully verified, we write it to our database and send an email to the user to activate his account.
REG.PHP FILE
You have successfully registered! Please activate your account!!"; //Activate the account if(isset($_GET["key"])) ( //Check the key $sql = "SELECT * FROM `". BEZ_DBPREFIX ."reg` WHERE `active_hex` = "". escape_str( $_GET["key"]) ."""; $res = mysqlQuery($sql); if(mysql_num_rows($res) == 0) $err = "Activation key is invalid!"; //Check for errors and display to the user if(count($err) > 0) echo showErrorMessage($err); else ( //Get the user's address $row = mysql_fetch_assoc($res); $email = $row["login"]; //Activate the account user $sql = "UPDATE `".BEZ_DBPREFIX ."reg` SET `status` = 1 WHERE `login` = "".$email ."""; $res = mysqlQuery($sql); //Send activation email $title = "(!LANG:Your account at http://website has been successfully activated"; $message = "Поздравляю Вас, Ваш аккаунт на http://сайт успешно активирован"; sendMessageMail($email, BEZ_MAIL_AUTOR, $title, $message); /*Перенаправляем пользователя на нужную нам страницу*/ header("Location:". BEZ_HOST ."less/reg/?mode=reg&active=ok"); exit; } } /*Если нажата кнопка на регистрацию, начинаем проверку*/ if(isset($_POST["submit"])) { //Утюжим пришедшие данные if(empty($_POST["email"])) $err = "Поле Email не может быть пустым!"; else { if(!preg_match("/^!} [email protected](+\.)+(2,6)$/i", $_POST["email"])) $err = "Email entered incorrectly"."\n"; ) if(empty($_POST[ "pass"])) $err = "Password field cannot be empty"; if(empty($_POST["pass2"])) $err = "Password Confirmation field cannot be empty"; //Check for errors and display to the user if(count($err) > 0) echo showErrorMessage($err); else ( /*We continue to check the entered data Check for matching passwords*/ if($_POST["pass"] != $_POST["pass2" ]) $err = "Passwords do not match"; //Check for errors and display to the user if(count($err) > 0) echo showErrorMessage($err); else ( /*Check if we have such a user in the database* / $sql = "SELECT `login` FROM `".BEZ_DBPREFIX ."reg` WHERE `login` = "".escape_str($_POST["email"]) ."""; $res = mysqlQuery($sql); if(mysql_num_rows($res) > 0) $err = "Sorry Login: ". $_POST["email"] ." busy!"; //Check for errors and display to the user if(count($err) > 0) echo showErrorMessage($err); else ( //Get the HASH of the salt $salt = salt(); //Salt the password $pass = md5(md5($_POST["pass"]).$salt); /*If all goes well, write data to the database*/ $sql = "INSERT INTO `". BEZ_DBPREFIX ."reg` VALUES("", "" .escape_str($_POST["email"]) ."", "". $pass ."", "". $salt ."", "". md5($salt) ."", 0)"; $ res = mysqlQuery($sql); //Send activation email $url = BEZ_HOST ."less/reg/?mode=reg&key=". md5($salt); $title = "(!LANG:Registration on http:/ /website"; $message = "Для активации Вашего акаунта пройдите по ссылке ". $url .""; sendMessageMail($_POST["email"], BEZ_MAIL_AUTOR, $title, $message); //Сбрасываем параметры header("Location:". BEZ_HOST ."less/reg/?mode=reg&status=ok"); exit; } } } } ?>!}
REG_FORM.HTML FILE
PHP MySQL user registration with activation email
Fields with an icon * required
Since our user registration is ready, it's time to write authorization. We will create a form for user authorization, then we will write an authorization form handler and, finally, we will make a script show.php which will show us whether we are authorized in the system or not.
AUTH.PHP FILE
0) echo showErrorMessage($err); else ( /*Create a fetch query from the database to authenticate the user*/ $sql = "SELECT * FROM `". BEZ_DBPREFIX ."reg` WHERE `login` = "". escape_str($_POST["email"]) ."" AND `status` = 1"; $res = mysqlQuery($sql); //If login matches, check password if(mysql_num_rows($res) > 0) ( //Get data from table $row = mysql_fetch_assoc( $res); if(md5(md5($_POST["pass"]).$row["salt"]) == $row["pass"]) ( $_SESSION["user"] = true; // Reset parameters header("Location:". BEZ_HOST ."less/reg/?mode=auth"); exit; ) else echo showErrorMessage("Wrong password!"); ) else echo showErrorMessage("Login ". $_POST["email"] ." not found!"); ) ) ?>
For those who have the latest version of PHP, I post this script using PDO because extension MySQL is deprecated and has been removed from the new version of PHP. Download registration and authorization php mysql pdo
The archive was updated on February 24, 2015.
Attention: If you are using this script on a local server like DENWER,XAMPP, then you should not wait for letters to your mailbox. Letters are in the stub sendmail. IN Denver you can find them along the way Z:\tmp\!sendmail\ You can open these files in any email client.
In this article, you will learn how to create a registration and authorization form using HTML, JavaScript, PHP and MySql. Such forms are used on almost every site, regardless of its type. They are created for the forum, and for the online store and for social networks (such as Facebook, Twiter, Odnoklassniki) and for many other types of sites.
If you have a site on your local computer, then I hope you already have . Nothing will work without it.
Creating a Table in the Database
In order to implement user registration, we first need a Database. If you already have it, then great, otherwise, you need to create it. In the article, I explain in detail how to do this.
And so, we have a Database (abbreviated DB), now we need to create a table users in which we will add our registered users.
How to create a table in the database, I also explained in the article. Before creating a table, we need to define what fields it will contain. These fields will match the fields from the registration form.
So, we thought, imagined what fields our form will have and create a table users with these fields:
- id- Identifier. Field id should be in every table from the database.
- first_name- To save the name.
- last_name- To save the last name.
- email- To save the postal address. We will use e-mail as a login, so this field must be unique, that is, have a UNIQUE index.
- email_status- A field to indicate whether the mail is confirmed or not. If the mail is confirmed, then it will have a value of 1, otherwise it will have a value of 0. By default, this field will have a value of 0.
- password- To save the password.
All fields of type "VARCHAR" must default to NULL.

If you want your registration form to have some more fields, you can add them here as well.
That's it, our table users ready. Let's move on to the next step.
Database connection
We have created the database, now we need to connect to it. We will connect using the MySQLi PHP extension.
In the folder of our site, create a file with the name dbconnect.php, and in it we write the following script:
Database connection error. Error Description: ".mysqli_connect_error()."
"; exit(); ) // Set the connection encoding $mysqli->set_charset("utf8"); //For convenience, add a variable here that will contain the name of our site $address_site = "http://testsite.local" ; ?>This file dbconnect.php will need to be connected to form handlers.
Pay attention to the variable $address_site, here I have indicated the name of my test site, which I will work on. You accordingly indicate the name of your site.
Site structure
Now let's take a look at the HTML structure of our website.
Move the site header and footer to separate files, header.php And footer.php. We will connect them on all pages. Namely, on the main (file index.php), to the page with the registration form (file form_register.php) and on the page with the authorization form (file form_auth.php).
Block with our links, registration And authorization, add to the header of the site so that they are displayed on all pages. One link will enter on registration form page(file form_register.php) and the other to the page with authorization form(file form_auth.php).
Content of header.php file:
The name of our site
As a result, our main page looks like this:

Of course, your site may have a completely different structure, but this is not important for us now. The main thing is that there are links (buttons) for registration and authorization.
Now let's move on to the registration form. As you already understood, we have it in the file form_register.php.
We go to the Database (in phpMyAdmin), open the table structure users and see what fields we need. So, we need fields for entering a first and last name, a field for entering a postal address (Email) and a field for entering a password. And for security purposes, we will add a captcha input field.
On the server, as a result of processing the registration form, various errors may occur due to which the user will not be able to register. Therefore, in order for the user to understand why the registration fails, it is necessary to display messages about these errors to him.
Before displaying the form, we add a block to display error messages from the session.
And another moment, if the user is already authorized, and for the sake of interest, he enters the registration page directly by writing in the address bar of the browser website_url/form_register.php, then in this case, instead of the registration form, we will display a title for it that it is already registered.
In general, the file code form_register.php we got it like this:
You are already registered
In the browser, the registration page looks like this:

Via required attribute, we have made all fields mandatory.
Pay attention to the registration form code where captcha is displayed:

We in the value of the src attribute for the image, specified the path to the file captcha.php, which generates this captcha.
Let's look at the code of the file captcha.php:
The code is well commented, so I'll just focus on one point.
Inside a function imageTtfText(), the path to the font is specified verdana.ttf. So for the captcha to work correctly, we must create a folder fonts, and put the font file there verdana.ttf. You can find and download it from the Internet, or take it from the archive with the materials of this article.
We are done with the HTML structure, it's time to move on.
Validating email with jQuery
Any form needs validation of the entered data, both on the client side (using JavaScript, jQuery) and on the server side.
We must pay special attention to the Email field. It is very important that the entered email address is valid.
For this input field, we set the type email (type="email"), this warns us a little bit against incorrect formats. But, this is not enough, because through the code inspector that the browser provides us, you can easily change the value of the attribute type from email on the text, and that's it, our check will no longer be valid.

And in that case, we have to make a more reliable check. To do this, we will use the jQuery library from JavaScript.
To connect the jQuery library, in the file header.php between tags , before the closing tag , add this line:
Right after this line, add the email validation check code. Here we add the code for checking the length of the entered password. It must be at least 6 characters long.
With the help of this script, we check the entered email address for validity. If the user entered the wrong Email, then we display an error about it and deactivate the submit button of the form. If everything is fine, then we remove the error and activate the submit button of the form.
And so, with the form validation on the client side, we are done. Now we can send it to the server, where we will also do a couple of checks and add data to the database.
User registration
We send the form for processing to the file register.php, via the POST method. The name of this handler file, specified in the attribute value action. And the send method is specified in the attribute value method.
Open this file register.php and the first thing we need to do is write a session launch function and include the file we created earlier dbconnect.php(In this file, we made a connection to the database). And yet, immediately declare the cells error_messages And success_messages in the session global array. IN error_mesages we will record all error messages that occur during form processing, and in success_messages Let's write happy messages.
Before continuing, we must check whether the form was submitted at all. An attacker can look at the value of an attribute action from the form, and find out which file is processing this form. And he may come up with the idea to go directly to this file by typing the following address in the address bar of the browser: http://site_site/register.php
So we need to check if there is a cell in the global POST array whose name matches the name of our "Register" button from the form. Thus, we check whether the "Register" button was pressed or not.
If an attacker tries to go directly to this file, he will receive an error message. I remind you that the $address_site variable contains the name of the site and it was declared in the file dbconnect.php.
Mistake! main page .
"); } ?>The captcha value in the session was added during its generation, in the file captcha.php. As a reminder, I will show once again this piece of code from the file captcha.php, where the captcha value is added to the session:
Now let's get to the test itself. In file register.php, inside the if block, where we check whether the "Register" button was pressed, or rather, where the comment " // (1) Place for the next piece of code"we write:
//Check the received captcha //Trim spaces from the beginning and from the end of the string $captcha = trim($_POST["captcha"]); if(isset($_POST["captcha"]) && !empty($captcha))( //Compare the received value with the value from the session. if(($_SESSION["rand"] != $captcha) && ($_SESSION ["rand"] != ""))( // If the captcha is not correct, then return the user to the registration page, and there we will display an error message that he entered the wrong captcha. $error_message = "
Mistake! You entered the wrong captcha
"; // Save the error message to the session. $_SESSION["error_messages"] = $error_message; // Return the user to the registration page header("HTTP/1.1 301 Moved Permanently"); header("Location: ".$address_site ."/form_register.php"); //Stop the script exit(); ) // (2) Place for the next piece of code )else( //If the captcha is not passed or it is empty exit("Mistake! There is no verification code, that is, the captcha code. You can go to the main page.
"); }Next, we need to process the received data from the POST array. First of all, we need to check the contents of the global POST array, that is, whether there are cells there whose names match the names of the input fields from our form.
If the cell exists, then we trim the spaces from the beginning and from the end of the string from this cell, otherwise, we redirect the user back to the page with the registration form.
Further, after the spaces have been trimmed, we add a string to the variable and check this variable for emptiness, if it is not empty, then move on, otherwise we redirect the user back to the page with the registration form.
Paste this code in the specified location // (2) Place for the next piece of code".
/* Check if the global array $_POST contains data submitted from the form and enclose the submitted data in regular variables.*/ if(isset($_POST["first_name"]))( // Trim spaces from the beginning and end of the string $first_name = trim($_POST["first_name"]); //Check if the variable is empty if(!empty($first_name))( // For safety, convert special characters to HTML entities $first_name = htmlspecialchars($first_name, ENT_QUOTES) ; )else( // Save the error message to the session. $_SESSION["error_messages"] .= "
Enter your name
Name field missing
"; //Return the user to the registration page header("HTTP/1.1 301 Moved Permanently"); header("Location: ".$address_site."/form_register.php"); //Stop the script exit(); ) if( isset($_POST["last_name"]))( // Trim spaces from the beginning and end of the string $last_name = trim($_POST["last_name"]); if(!empty($last_name))( // For safety , convert special characters to HTML entities $last_name = htmlspecialchars($last_name, ENT_QUOTES); )else( // Save the error message to the session. $_SESSION["error_messages"] .= "Enter your last name
"; //Return the user to the registration page header("HTTP/1.1 301 Moved Permanently"); header("Location: ".$address_site."/form_register.php"); //Stop the script exit(); ) )else ( // Save the error message to the session. $_SESSION["error_messages"] .= "Name field missing
"; //Return the user to the registration page header("HTTP/1.1 301 Moved Permanently"); header("Location: ".$address_site."/form_register.php"); //Stop the script exit(); ) if( isset($_POST["email"]))( // Trim spaces from the beginning and end of the string $email = trim($_POST["email"]); if(!empty($email))( $email = htmlspecialchars ($email, ENT_QUOTES); // (3) Place of code to check the format of the email address and its uniqueness )else( // Save the error message to the session. $_SESSION["error_messages"] .= "Enter your email
"; //Return the user to the registration page header("HTTP/1.1 301 Moved Permanently"); header("Location: ".$address_site."/form_register.php"); //Stop the script exit(); ) )else ( // Save the error message to the session. $_SESSION["error_messages"] .= " "; //Return the user to the registration page header("HTTP/1.1 301 Moved Permanently"); header("Location: ".$address_site."/form_register.php"); //Stop the script exit(); ) if( isset($_POST["password"]))( // Trim spaces from the beginning and end of the string $password = trim($_POST["password"]); if(!empty($password))( $password = htmlspecialchars ($password, ENT_QUOTES); //Encrypt the password $password = md5($password."top_secret"); )else( // Save the error message to the session. $_SESSION["error_messages"] .= "Enter your password
"; //Return the user to the registration page header("HTTP/1.1 301 Moved Permanently"); header("Location: ".$address_site."/form_register.php"); //Stop the script exit(); ) )else ( // Save the error message to the session. $_SESSION["error_messages"] .= " "; //Return the user to the registration page header("HTTP/1.1 301 Moved Permanently"); header("Location: ".$address_site."/form_register.php"); //Stop the script exit(); ) // (4) Place for the code for adding a user to the databaseThe field is of particular importance. email. We have to check the format of the received mailing address and its uniqueness in the database. That is, whether a user with the same email address is already registered.
At the specified location" // (3) Place of code to check the format of the postal address and its uniqueness" add the following code:
//Check the format of the received email address using the regular expression $reg_email = "/^**@(+(*+)*\.)++/i"; //If the format of the received email address does not match the regular expression if(!preg_match($reg_email, $email))( // Save the error message to the session. $_SESSION["error_messages"] .= "
You entered an invalid email
"; //Return the user to the registration page header("HTTP/1.1 301 Moved Permanently"); header("Location: ".$address_site."/form_register.php"); //Stop the script exit(); ) // Check if there is already such an address in the database $result_query = $mysqli->query("SELECT `email` FROM `users` WHERE `email`="".$email."""); If there are exactly one rows, then the user with this email address is already registered if($result_query->num_rows == 1)( //If the result is not false if(($row = $result_query->fetch_assoc()) != false) ( // Save the error message to the session. $_SESSION["error_messages"] .= "User with this email address is already registered
"; //Return the user to the registration page header("HTTP/1.1 301 Moved Permanently"); header("Location: ".$address_site."/form_register.php"); )else( //Save the error message to the session .$_SESSION["error_messages"] .= "Error in database query
"; //Return the user to the registration page header("HTTP/1.1 301 Moved Permanently"); header("Location: ".$address_site."/form_register.php"); ) /* close the selection */ $result_query-> close(); //Stop the script exit(); ) /* close the selection */ $result_query->close();And so, we are done with all the checks, it's time to add the user to the database. At the specified location" // (4) Place for the code for adding a user to the database" add the following code:
//Query to add a user to the database $result_query_insert = $mysqli->query("INSERT INTO `users` (first_name, last_name, email, password) VALUES ("".$first_name."", "".$last_name." ", "".$email."", "".$password."")"); if(!$result_query_insert)( // Save the error message to the session. $_SESSION["error_messages"] .= "
Error request to add a user to the database
"; //Return the user to the registration page header("HTTP/1.1 301 Moved Permanently"); header("Location: ".$address_site."/form_register.php"); //Stop the script exit(); )else( $_SESSION["success_messages"] = " "; //Send the user to the login page header("HTTP/1.1 301 Moved Permanently"); header("Location: ".$address_site."/form_auth.php"); ) /* Complete the request */ $result_query_insert-> close(); //Close the database connection $mysqli->close();If an error occurs in the request to add a user to the database, we add a message about this error to the session and return the user to the registration page.
Otherwise, if everything went well, we also add a message to the session, but it is already more pleasant, namely, we tell the user that the registration was successful. And we redirect it to the page with the authorization form.
The script for checking the format of the email address and the length of the password is in the file header.php, so it will affect fields from that form as well.
The session is also started in the file header.php, so in the file form_auth.php the session does not need to be started, because we get an error.

As I said, the script for checking the format of the mail address and the length of the password also works here. Therefore, if the user enters the wrong email address or short password, he will immediately receive an error message. A button to come in will become inactive.

After fixing the errors, the button to come in becomes active and the user can submit the form to the server where it will be processed.
User authorization
To attribute value action the authorization form has a file auth.php, which means that the form will be processed in this file.
So let's open the file auth.php and write the code to process the authorization form. The first thing to do is start the session and include the file dbconnect.php to connect to the database.
//Declare a cell to add errors that may occur during form processing. $_SESSION["error_messages"] = ""; //Declare a cell to add successful messages $_SESSION["success_messages"] = "";
/* Check if the form was submitted, that is, if the Login button was clicked. If yes, then we go further, if not, then we will display an error message to the user, stating that he went to this page directly. */ if(isset($_POST["btn_submit_auth"]) && !empty($_POST["btn_submit_auth"]))( //(1) Place for the next piece of code )else( exit("
Mistake! You have accessed this page directly, so there is no data to process. You can go to the main page.
"); }//Check the received captcha if(isset($_POST["captcha"]))( //Trim spaces from the beginning and end of the string $captcha = trim($_POST["captcha"]); if(!empty($captcha ))( //Compare the received value with the value from the session. if(($_SESSION["rand"] != $captcha) && ($_SESSION["rand"] != ""))( // If the captcha is invalid , then we return the user to the authorization page, and there we will display an error message that he entered the wrong captcha. $error_message = "
Mistake! You entered the wrong captcha
"; // Save the error message to the session. $_SESSION["error_messages"] = $error_message; // Return the user to the authorization page header("HTTP/1.1 301 Moved Permanently"); header("Location: ".$address_site ."/form_auth.php"); //Stop the script exit(); ) )else( $error_message = "Mistake! The captcha input field must not be empty.
"; // Save the error message to the session. $_SESSION["error_messages"] = $error_message; // Return the user to the authorization page header("HTTP/1.1 301 Moved Permanently"); header("Location: ".$address_site ."/form_auth.php"); //Stop the script exit(); ) //(2) Place for processing the mail address //(3) Place for processing the password //(4) Place for making a query to the database )else ( //If captcha is not passed exit("Mistake! There is no verification code, that is, the captcha code. You can go to the main page.
"); }If the user has entered the verification code correctly, then we move on, otherwise we return him to the authorization page.
Email address verification
// Trim spaces from the beginning and end of the string $email = trim($_POST["email"]); if(isset($_POST["email"]))( if(!empty($email))( $email = htmlspecialchars($email, ENT_QUOTES); //Check the format of the received email address using the regular expression $reg_email = " /^**@(+(*+)*\.)++/i"; //If the format of the received email address does not match the regular expression if(!preg_match($reg_email, $email))( // Save to the session error message.$_SESSION["error_messages"] .= "
You entered an invalid email
"; //Return the user to the authorization page header("HTTP/1.1 301 Moved Permanently"); header("Location: ".$address_site."/form_auth.php"); //Stop the script exit(); ) )else ( // Save the error message to the session. $_SESSION["error_messages"] .= "The field for entering the postal address (email) should not be empty.
"; //Return the user to the registration page header("HTTP/1.1 301 Moved Permanently"); header("Location: ".$address_site."/form_register.php"); //Stop the script exit(); ) )else ( // Save the error message to the session. $_SESSION["error_messages"] .= "There is no field for entering Email
"; //Return the user to the authorization page header("HTTP/1.1 301 Moved Permanently"); header("Location: ".$address_site."/form_auth.php"); //Stop the script exit(); ) // (3) Place for password processingIf the user has entered an email address in the wrong format or the value of the email address field is empty, then we return him to the authorization page, where we display a message about this.
Password check
The next field to process is the password field. To the designated place" //(3) Place for password processing", we write:
If(isset($_POST["password"]))( // Trim spaces from the beginning and end of the string $password = trim($_POST["password"]); if(!empty($password))( $password = htmlspecialchars($password, ENT_QUOTES); // Encrypt the password $password = md5($password."top_secret"); )else( // Save the error message to the session. $_SESSION["error_messages"] .= "
Enter your password
"; //Return the user to the registration page header("HTTP/1.1 301 Moved Permanently"); header("Location: ".$address_site."/form_auth.php"); //Stop the script exit(); ) )else ( // Save the error message to the session. $_SESSION["error_messages"] .= "There is no field for entering a password
"; //Return the user to the registration page header("HTTP/1.1 301 Moved Permanently"); header("Location: ".$address_site."/form_auth.php"); //Stop the script exit(); )Here, using the md5 () function, we encrypt the received password, since in the database we have passwords in encrypted form. Additional secret word in encryption, in our case " top_secret" must be the one that was used when registering the user.
Now you need to make a query to the database on a user selection whose mail address is equal to the received mail address and the password is equal to the received password.
//Query to the database on the user's selection. $result_query_select = $mysqli->query("SELECT * FROM `users` WHERE email = "".$email."" AND password = "".$password."""); if(!$result_query_select)( // Save the error message to the session. $_SESSION["error_messages"] .= "
Query error on user selection from database
"; //Return the user to the registration page header("HTTP/1.1 301 Moved Permanently"); header("Location: ".$address_site."/form_auth.php"); //Stop the script exit(); )else( //Check if there is no user with such data in the database, then display an error message if($result_query_select->num_rows == 1)( // If the entered data matches the data from the database, then save the login and password to the session array. $_SESSION["email"] = $email; $_SESSION["password"] = $password; //Return the user to the main page header("HTTP/1.1 301 Moved Permanently"); header("Location: ".$address_site ."/index.php"); )else( // Save the error message to the session. $_SESSION["error_messages"] .= "Wrong username and/or password
"; //Return the user to the authorization page header("HTTP/1.1 301 Moved Permanently"); header("Location: ".$address_site."/form_auth.php"); //Stop the script exit(); ) )Site exit
And the last thing we implement is exit procedure. At the moment, in the header we display links to the authorization page and the registration page.
In the site header (file header.php), using the session, we check if the user is already logged in. If not, then we display the registration and authorization links, otherwise (if it is authorized), then instead of the registration and authorization links we display the link Output.
Modified piece of code from file header.php:
registration
Output
When you click on the exit link from the site, we get into the file logout.php, where we simply destroy the cells with the email address and password from the session. After that, we return the user back to the page on which the link was clicked output.
File code logout.php:
That's all. Now you know how implement and process registration and authorization forms user on your site. These forms are found on almost every site, so every programmer should know how to create them.
We also learned how to validate input data, both on the client side (in the browser, using JavaScript, jQuery) and on the server side (using the PHP language). We also learned implement logout procedure.
All scripts are tested and working. You can download the archive with the files of this small site from this link.
In the future I will write an article where I will describe. And I also plan to write an article where I will explain (without reloading the page). So, in order to be aware of the release of new articles, you can subscribe to my site.
If you have any questions, please contact, also, if you notice any mistake in the article, please let me know.
Lesson Plan (Part 5):
- Creating an HTML Structure for the Authorization Form
- We process the received data
- We display the user's greeting in the header of the site
Liked the article?
Hello! Now we will try to implement the simplest registration on the site using PHP + MySQL. To do this, Apache must be installed on your computer. How our script works is shown below.
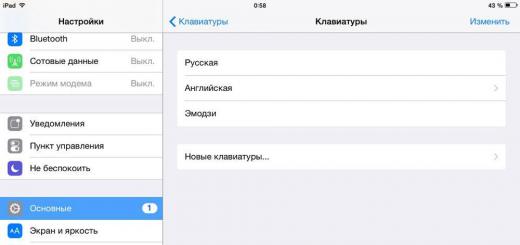
1. Let's start by creating the users table in the database. It will contain user data (login and password). Let's go to phpmyadmin (if you create a database on your PC http://localhost/phpmyadmin/). Create a table users, it will have 3 fields.

I create it in mysql database, you can create it in another database. Next, set the values, as in the figure:
2. A connection to this table is required. Let's create a file bd.php. Its content:
$db = mysql_connect("your MySQL server","login to this server","password to this server");
mysql_select_db ("name of the database to connect to", $db);
?>
In my case it looks like this:
$db = mysql_connect("localhost","user","1234");
mysql_select_db("mysql",$db);
?>
We save bd.php.
Fine! We have a table in the database, a connection to it. Now you can start creating a page where users will leave their data.
3. Create a reg.php file with content (all comments inside):
registration
4. Create a file, which will enter data into the database and save the user. save_user.php(comments inside):
{
}
//if the login and password are entered, then we process them so that tags and scripts do not work, you never know what people can enter
// remove extra spaces
$login = trim($login);
$password = trim($password);
// connect to the database
// check for the existence of a user with the same login
$result = mysql_query("SELECT id FROM users WHERE login="$login"",$db);
if (!empty($myrow["id"])) (
exit("Sorry, the username you entered is already registered. Please enter another username.");
}
// if there is none, then save the data
$result2 = mysql_query ("INSERT INTO users (login,password) VALUES("$login","$password")");
// Check if there are errors
if ($result2=="TRUE")
{
echo "You have successfully registered! Now you can enter the site. Main page";
}
else(
echo "Error! You are not logged in.";
}
?>
5. Now our users can register! Next, you need to make a "door" to enter the site for already registered users. index.php(comments inside):
// the whole procedure works on sessions. It is in it that the user's data is stored while he is on the site. It is very important to launch them at the very beginning of the page!!!
session_start();
?>
Main page
// Check if the login and user id variables are empty
if (empty($_SESSION["login"]) or empty($_SESSION["id"]))
{
// If empty, we don't display the link
echo "You are logged in as a guest
This link is only available to registered users";
}
else
{
In file index.php we will display a link that will be open only to registered users. This is the whole point of the script - to restrict access to any data.
6. There is a file with verification of the entered login and password. testreg.php (comments inside):
session_start();// the whole procedure works on sessions. It is in it that the user's data is stored while he is on the site. It is very important to launch them at the very beginning of the page!!!
if (isset($_POST["login"])) ( $login = $_POST["login"]; if ($login == "") ( unset($login);) ) //put the login entered by the user into the $login variable, if it is empty, then we destroy the variable
if (isset($_POST["password"])) ( $password=$_POST["password"]; if ($password =="") ( unset($password);) )
//put the password entered by the user into the $password variable, if it is empty, then destroy the variable
if (empty($login) or empty($password)) //if the user has not entered a login or password, then we issue an error and stop the script
{
exit("You did not enter all the information, go back and fill in all the fields!");
}
//if the login and password are entered, then we process them so that tags and scripts do not work, you never know what people can enter
$login = stripslashes($login);
$login = htmlspecialchars($login);
$password = stripslashes($password);
$password = htmlspecialchars($password);
// remove extra spaces
$login = trim($login);
$password = trim($password);
// connect to the database
include("bd.php");// the bd.php file should be in the same folder as everyone else, if it's not then just change the path
$result = mysql_query("SELECT * FROM users WHERE login="$login"",$db); //retrieve all data about the user with the entered login from the database
$myrow = mysql_fetch_array($result);
if (empty($myrow["password"]))
{
//if the user with the entered login does not exist
}
else(
//if exists, check passwords
if ($myrow["password"]==$password) (
//if the passwords match, then we start the session for the user! You can congratulate him, he entered!
$_SESSION["login"]=$myrow["login"];
$_SESSION["id"]=$myrow["id"];//this data is very often used, so the logged in user will "carry" them
echo "You have successfully logged into the site! Main page";
}
else(
//if passwords don't match
Exit("Sorry, the login or password you entered is incorrect.");
}
}
?>
Well that's all! Maybe the lesson is boring, but very useful. Only the idea of registration is shown here, further you can improve it: add protection, design, data fields, upload avatars, log out of the account (for this, simply destroy the variables from the session with the function unset) etc. Good luck!
Checked everything, it works fine!
Forms- an indispensable part of any web application. We use them to authorize and register a new user, on the feedback page, when sending a comment, and for many other tasks. However, creating them and then validating them can be a frustrating process - and this is where Laravel comes in, giving us some neat classes to work with forms and their data in an intuitive way.
Creating Forms in Laravel
Creating forms in Laravel is surprisingly easy. For the most part, there's nothing stopping you from using standard HTML tags, but Laravel can make your life a lot easier. Let's say a PHP class Form has a PHP method label(), which allows you to associate labels with form fields using the corresponding (auto-generated) IDs. Let's create a simple form as an example:
PHP
Register!
?>
Everything is obvious, isn't it? We open the form POST- request on the route register, create some labels and input fields and add a CSRF key, after which we close the form. If we need safe route(using HTTPS), then replace the PHP call Form::open() per PHP call Form::open_secure(), and if we need to create a form for uploading files, PHP will come in handy Form::open_for_files() .
You must have noticed some PHP calls Input::old()- we'll talk about them, but for now, just remember that they are here.
Class Form contains many methods for easy creation of forms - you can find them in the documentation.
Cross-Site Request Forgery (CSRF)
I won't go into details about CSRF - Jeff Atwood wrote a very descriptive article on what it is and how to avoid it.
Method Form::token() creates a random sequence of characters, stores it in the session data (meaning you need to enable support for it in application/config/session.php) and outputs it as a hidden form field. When processing a request from a form that uses a CSRF key, we can use the built-in filter csrf to check that no one has "worked" on the request and that it really comes from the user.
Here is what the filter code looks like (file application/routes.php):
PHP Route::filter("csrf", function()(
if (Request::forged()) return Response::error("500");
});
We can customize it however we want, but for this article, the default handler will suffice.
PHP Route :: post ("register" , array("before" => "csrf" , function () (
// New User Registration.
}));
That's all we need to enable the CSRF filter - just make sure it's listed before.
Validation of entered data
Now that we've verified that the incoming request can be trusted, we need to validate the data that the user entered into the form. Back to our route register, let's add a check there, and then I'll explain what's what.
Several people have pointed out that the validation should not be done in the controller. It's usually best to do this in the model - my next article "Advanced Input Validation in Laravel" describes exactly this way of solving the problem.
PHP // application/routes.php file.
Route :: post ("register" , array("before" => "csrf" , function () (
$rules = array(
"username" => array("required" , "unique:users,username" ),
"email" => array("required" , "email" , "unique:users,email" ),
"password" => array("required" , "min:7" )
);
$validation = Validator :: make(Input :: all(), $rules );
If ($validation -> fails()) (
// validation failed.
return Redirect :: to ("register" )-> with_input ()-> with_errors($validation );
}
// data passed verification - we can create a new user.
}));
- Define an array of rules - keys match the form input field names, values- the rules they must comply with. In our case, the field username ("Username") should be filled(required) and unique(unique).
- Create a PHP object Validator - first parameter it takes data to validate (in our case, form data received via POST), second- a set of rules.
- Then we perform a check- if it fails, redirect the user back to the route register(using GET) with old input and error messages.
- If all fields are filled in correctly- register a new account, authorize the user, or do something else.
The sequence of actions that we perform here is called a template. "Post/Redirect/Get"(PRG) is a great way to prevent double submitting a form.
Now let's look at the rules we defined above.
required- indicates that the field must be filled in - in other words, it must have a value.
unique- this is a bit more complicated. This rule takes 3 parameters, 2 of which can be omitted. First parameter- the name of the table in which you want to check the value for uniqueness; second- field name in the table, if it does not match the field name in the form (in this case, it can be skipped); the third and the last parameter is the value ( id) for the primary key.
Suppose we are updating an existing user profile - we also want his e-mail to be unique, but if he decided not to change his address, then we should not say that the entered e-mail is already taken - by him. To do this, we pass the user ID - Laravel will exclude the corresponding entry from the check.
PHP $rules = array(
"email" => array("required" , "email" , "unique:users,email," . $user -> id )
);
e-mail- checks that the entered value Seems like to the correct e-mail address, but does not check it for Existence.
min- sets the minimum allowable length of the value of this field.
A complete list of available rules can be found in the documentation.
Error display
PHP property $validation -> errors contains the same object messages with all errors found in the input. Laravel will detect that a redirect has taken place with mistakes and automatically bind this object to submission. You will soon understand what I mean.
Remember PHP calls Input::old() in ? When we forward a request with input they will return the values that the user entered into the form earlier. So if I said my name was "Jason" but the registration didn't happen, "Jason" would remain entered even after I was redirected back to the form. Fine!
Password input fields do not initially have a default value, but you can set it explicitly using attribute array:
PHP echo Form :: password ("password" , array("value" => Input :: old ("password" )));
Let's go back to our form. As you remember, we have a variable $errors- PHP object messages. Let's make our form friendlier by displaying errors when it's not filled out correctly:
PHP
Register!
Echo Form::open("register" , "POST" );
echo Form :: label("username" , "Username" ) . Form::text("username" , Input::old("username" ));
if ($errors -> has("username"))(
echo $errors -> first("username");
}
echo Form :: label("email" , "E-mail" ) . Form::text("email" , Input::old("email" ));
if ($errors -> has("email")) (
echo $errors -> first("email" );
}
echo Form :: label("password" , "Password" ) . Form::password("password");
if ($errors -> has("password")) (
echo $errors -> first("password" );
}
echo Form::submit("Register!");
echo Form::token(). form::close();
?>
Messages will only be shown if a certain field contains errors.
You can format the message into the desired HTML by passing it in the second parameter:
PHP echo $errors -> first ("username" , " :message");
Or if you want to display the first error message for any field, not just username: ));
?>
PHP $errors -> all() returns an array of formatted messages, so we concatenate it into a string.
Own rules and mistakes
Often you will need to create your own rules for validating input. Before Laravel 3 this was done by class inheritance Validator and adding methods to it. With package support, a more robust solution was needed to avoid having to create multiple subclasses. Laravel 3 allows register custom rules using PHP Validator::register() :
PHP // this code can be placed in application/start.php for example:
Validator :: register("starts_with" , function ($attribute , $value , $parameters ) (
return starts_with ($value , $parameters [ 0 ]);
});
In this simple handler, we simply return true if the value starts with the specified string (passed in the first and only parameter), and false otherwise. Here is one of the few global functions Laravel - PHP starts_with() .
Using the new rule:
PHP $rules = array(
"website" => array("required" , "starts_with:http://" )
);
Here we need to define the field as obligatory("required"). In addition to this, we also need to add an error message to the file application/language/en/validation.php:
PHP "custom" => array(
"website_starts_with" => "Website must start with http://"
)
Or you can do it when creating an instance Validator, passing it to third parameter:
So, we have created a form that sends POST- a request to our route, where the input is checked by the controller - which, in turn, sends the client back when errors are found, saving the previous input and displaying the appropriate messages.